What is the nutritional value of your hay bales? This isn’t something you can just guess by eyeballing it. Rather, farmers rely on a qualified system of measurement (feed test) after utilising a hay corer to take a good, representative sample. What is a hay corer?
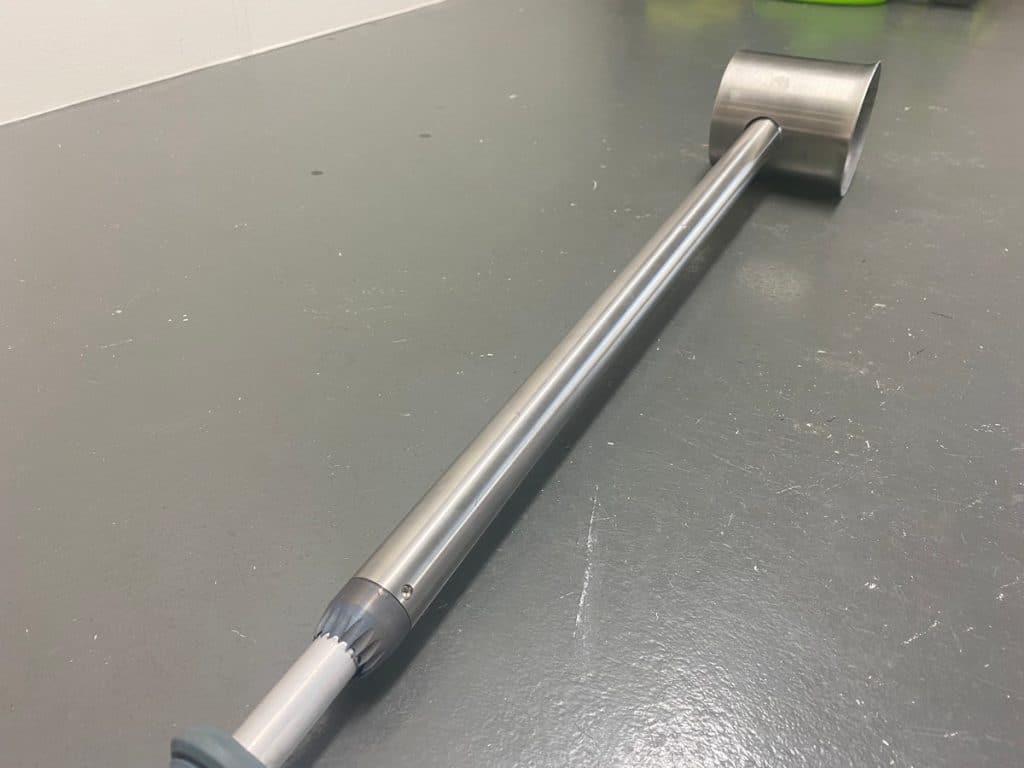
A hay corer is a metal tube that you insert into a bale of hay. The corer will collect a representative sample of that bale. By sending the sample to a lab, you can ascertain the nutritional content of your hay.
This article will tell you everything you need to know about hay corers, including what they are and how to use them. If you’re just beginning to test hay, then keep reading!

What Is A Hay Corer?
In the management of your product, feed testing is key, regardless of if you are selling your product or feeding out to your own livestock. We encourage all in the hay market to take full advantage of the tools available. This includes a hay corer, which is used to take a representative sample of product for feed testing, thus giving you more accurate results than if you were relying on the ‘grab’ sampling method for obtaining a sample.
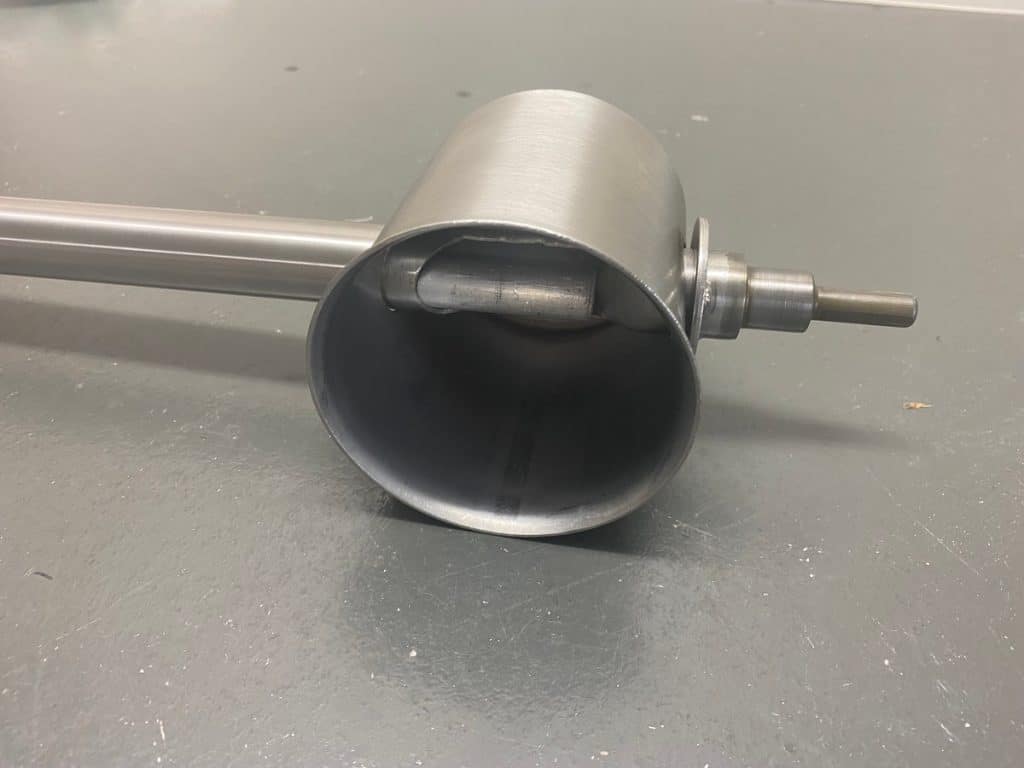
A hay testing corer is a long instrument made of metal. The corer features a tube with a pointed end that can enter into even tough bales of hay. The goal of using the testing corer is to produce a representative sample.
A representative sample is gathered on the principle that the corer penetrates through multiple layers of product, essentially taking multiple sample points at once.
A hay testing corer is a worthwhile investment to be used when testing your product…whether you are selling or buying product, you will want a feed test that accurately portrays your product. We recommend this Hay Corer.
Due to the heavy-duty construction of a hay corer, you can count on having yours for a good, long time, especially if you use it properly.

How Do You Test a Hay Sample?
A hay corer is the best tool you can use to collect a sample for nutritional analysis. The following steps outline the method in which you use the corer.
Step 1 – Choose the Hay
One sample point is not going to paint a clear enough picture of the nutritional content of your bales. You should randomly select from several bales over one lot.
One lot of product is defined as all having the same characteristics; this includes: harvested at the same stage of maturity, from the same field, all from the one cutting, consistent foreign material or weeds throughout, consistent weathering to the product in the windrow or in the bale if having been stored.
If the quality of your product varies, you may need to define your product as multiple lots and have these tested separately.
Step 2 – Core into your Bales
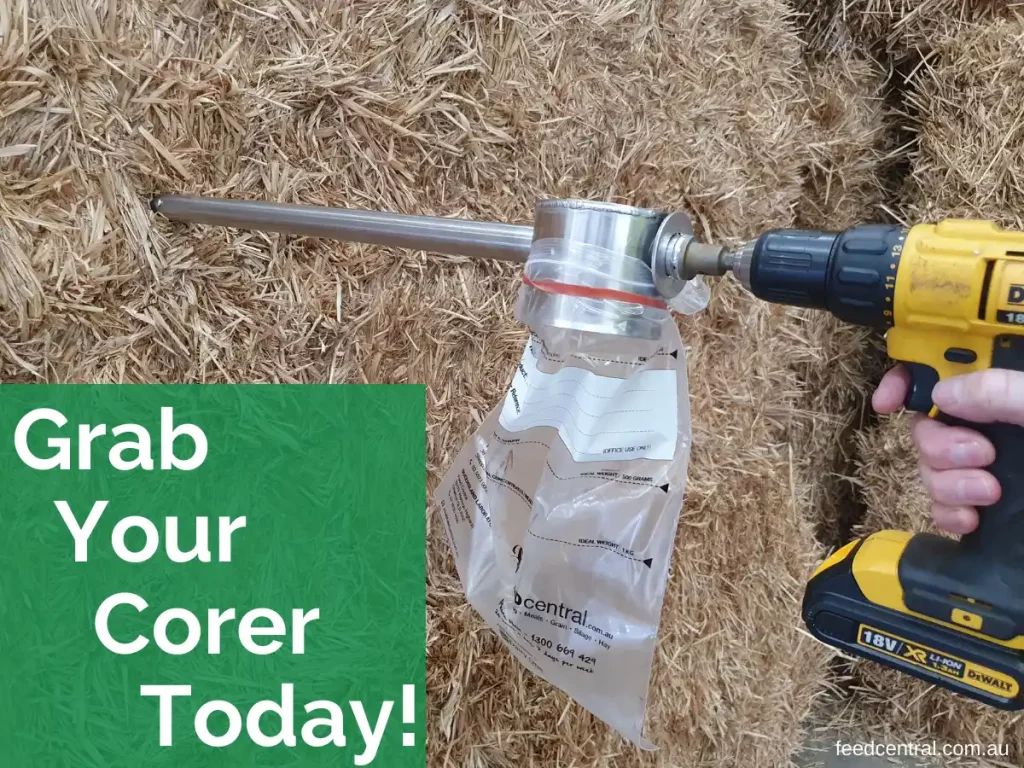
Where you test in the hay bale matters. You will need to pass the corer through multiple ‘biscuit’ layers. For large square bales that means that you will be coring through the ‘butt’ end of the bale, and for round bales you will be coring through the curvature of the bale.
Attach a collection bag to the bucket of your hay corer (best done with a thick rubber band). Insert the end of the hay corer into a standard cordless drill and drill it into the hay as deep as you can go.
This video explains how to take a hay sample.
See the full range of feed testing videos on our page on How to test hay.
Step 3 – Label Your Sample
After taking the hay sample, you will need to store it in a container or bag for transport to the laboratory. It is important to label your sample well. You will want to include your full name, the forage type, and a sample reference ID for your own records.
It is important to also complete any submission paperwork that the laboratory requests. This enables your sample to be processed smoothly and quickly. You should ensure that the submission paperwork clearly matches the sample information you have included on the label of your sample bag.
Please provide as much detailed information about your hay sample as you can. The quality of your lab results is only as good as the information you share, so keep that in mind!
Step 4 – Mail the Sample to a Forage Lab
Your sample is now ready to be submitted to the lab. You should be able to drop off or post your sample to a forage testing laboratory. Submission of your sample to the Feed Central laboratory can be made at:
10775 Warrego Highway, Charlton, QLD, 4350.
Alternatively, you can call the Feed Central office to request a sample submission kit containing everything you need to for submission into the laboratory: sample collection bags, reply-paid post bags, sample collection guidelines, and submission forms.
Feed Central offers standard NIR feed testing from $77, which provides you with a quality certificate you can use to sell your product or balance animal diets.
Step 5 – Wait for Your Hay to Come Back and Assess the Results
NIR feed testing generally has a rapid turnaround time, and you should expect your results back within a few days of receival of your sample to the laboratory.
Feed Central NIR results include: proteins, energies, fibres, ash, starch, and more. Once you have this information, you can determine how to market your hay, or if feeding the product to your own livestock, consult with your nutritionist to optimise their diet.
A Recap – What Is A Hay Corer?
A hay corer is a tool for taking representative samples of hay, which can then be sent to a forage laboratory to determine the nutritional content of your product.
Now that you know how to take hay samples, you can learn more about the hay on your farm!
